

I finished adding support for Cinepak encoded images in my QuickDraw viewer application. There is a document by Dr. Tim Ferguson written in 2001 which gives a pretty good overview how video are encoded in this format, with some additional notes in multimedia.cx wiki. Still, I though I give some additional explanations on how this codec is used for pictures and how my parser works.
Cinepak is interesting because, like road-pizza, it is lossy video compression that does not rely on the Discrete Cosine Transform (DCT), or one of its variants. Like for road-pizza, the image is divided into 4 pixel wide square blocks, what is different is that each block is encoded using a dictionary of 2×2 patterns stored in a what is called a codebook. The algorithm maintains two codebooks, one which is used when a block is rendered with four patterns (called v4) and one when a block is rendered using a single, upscaled pattern (called v1). Each codebook has 256 entries, which are identified using a 8 bit value.
To make things more complicated, a picture is divided in stripes, codebook entries are loaded at the beginning of the first stripe, subsequent stripes do not load a fresh set of entries, instead they amend the codebook, selectively replacing entries. To avoid transmitting the set of patterns of the stripe, each stripe only contains the difference.
The colours within a codebook entry are specified either as just 4 single byte luma values (8 bits per pixel), or 4 single byte luma values with two signed bytes for the chrominance (12 bits per pixel). While this looks like YUV, the formula is just an approximation that can be easily computed with shifts. Just for fun I implemented this using Swift SIMD instructions, and the code looks like this:
let u4 = SIMD4.init(repeating: Int16(u)); let v4 = SIMD4 .init(repeating: Int16(v)); let one = SIMD4 .one; let y4 = SIMD4 .init(clamping: y); let r = SIMD4 (clamping: y4 &+ (v4 &<< one)); let g = SIMD4 (clamping: y4 &- (u4 &>> one) &- v4); let b = SIMD4 (clamping: y4 &+ (u4 &<< one));
I’m pretty sure this was an unwarranted for optimisation, but the goal of this project is for me to try out stuff.
Now you would think that the first mode with four Y would only be used for grayscale images, or at least greyish blocks. You would be wrong, as this codec can be used in palette mode. In that mode, the Y value is actually just an index into a colour palette. All the images I managed to generate use the standard Apple 8-bit colour table (clut id 8). Which means, the actual RGB values are literally not in the file.
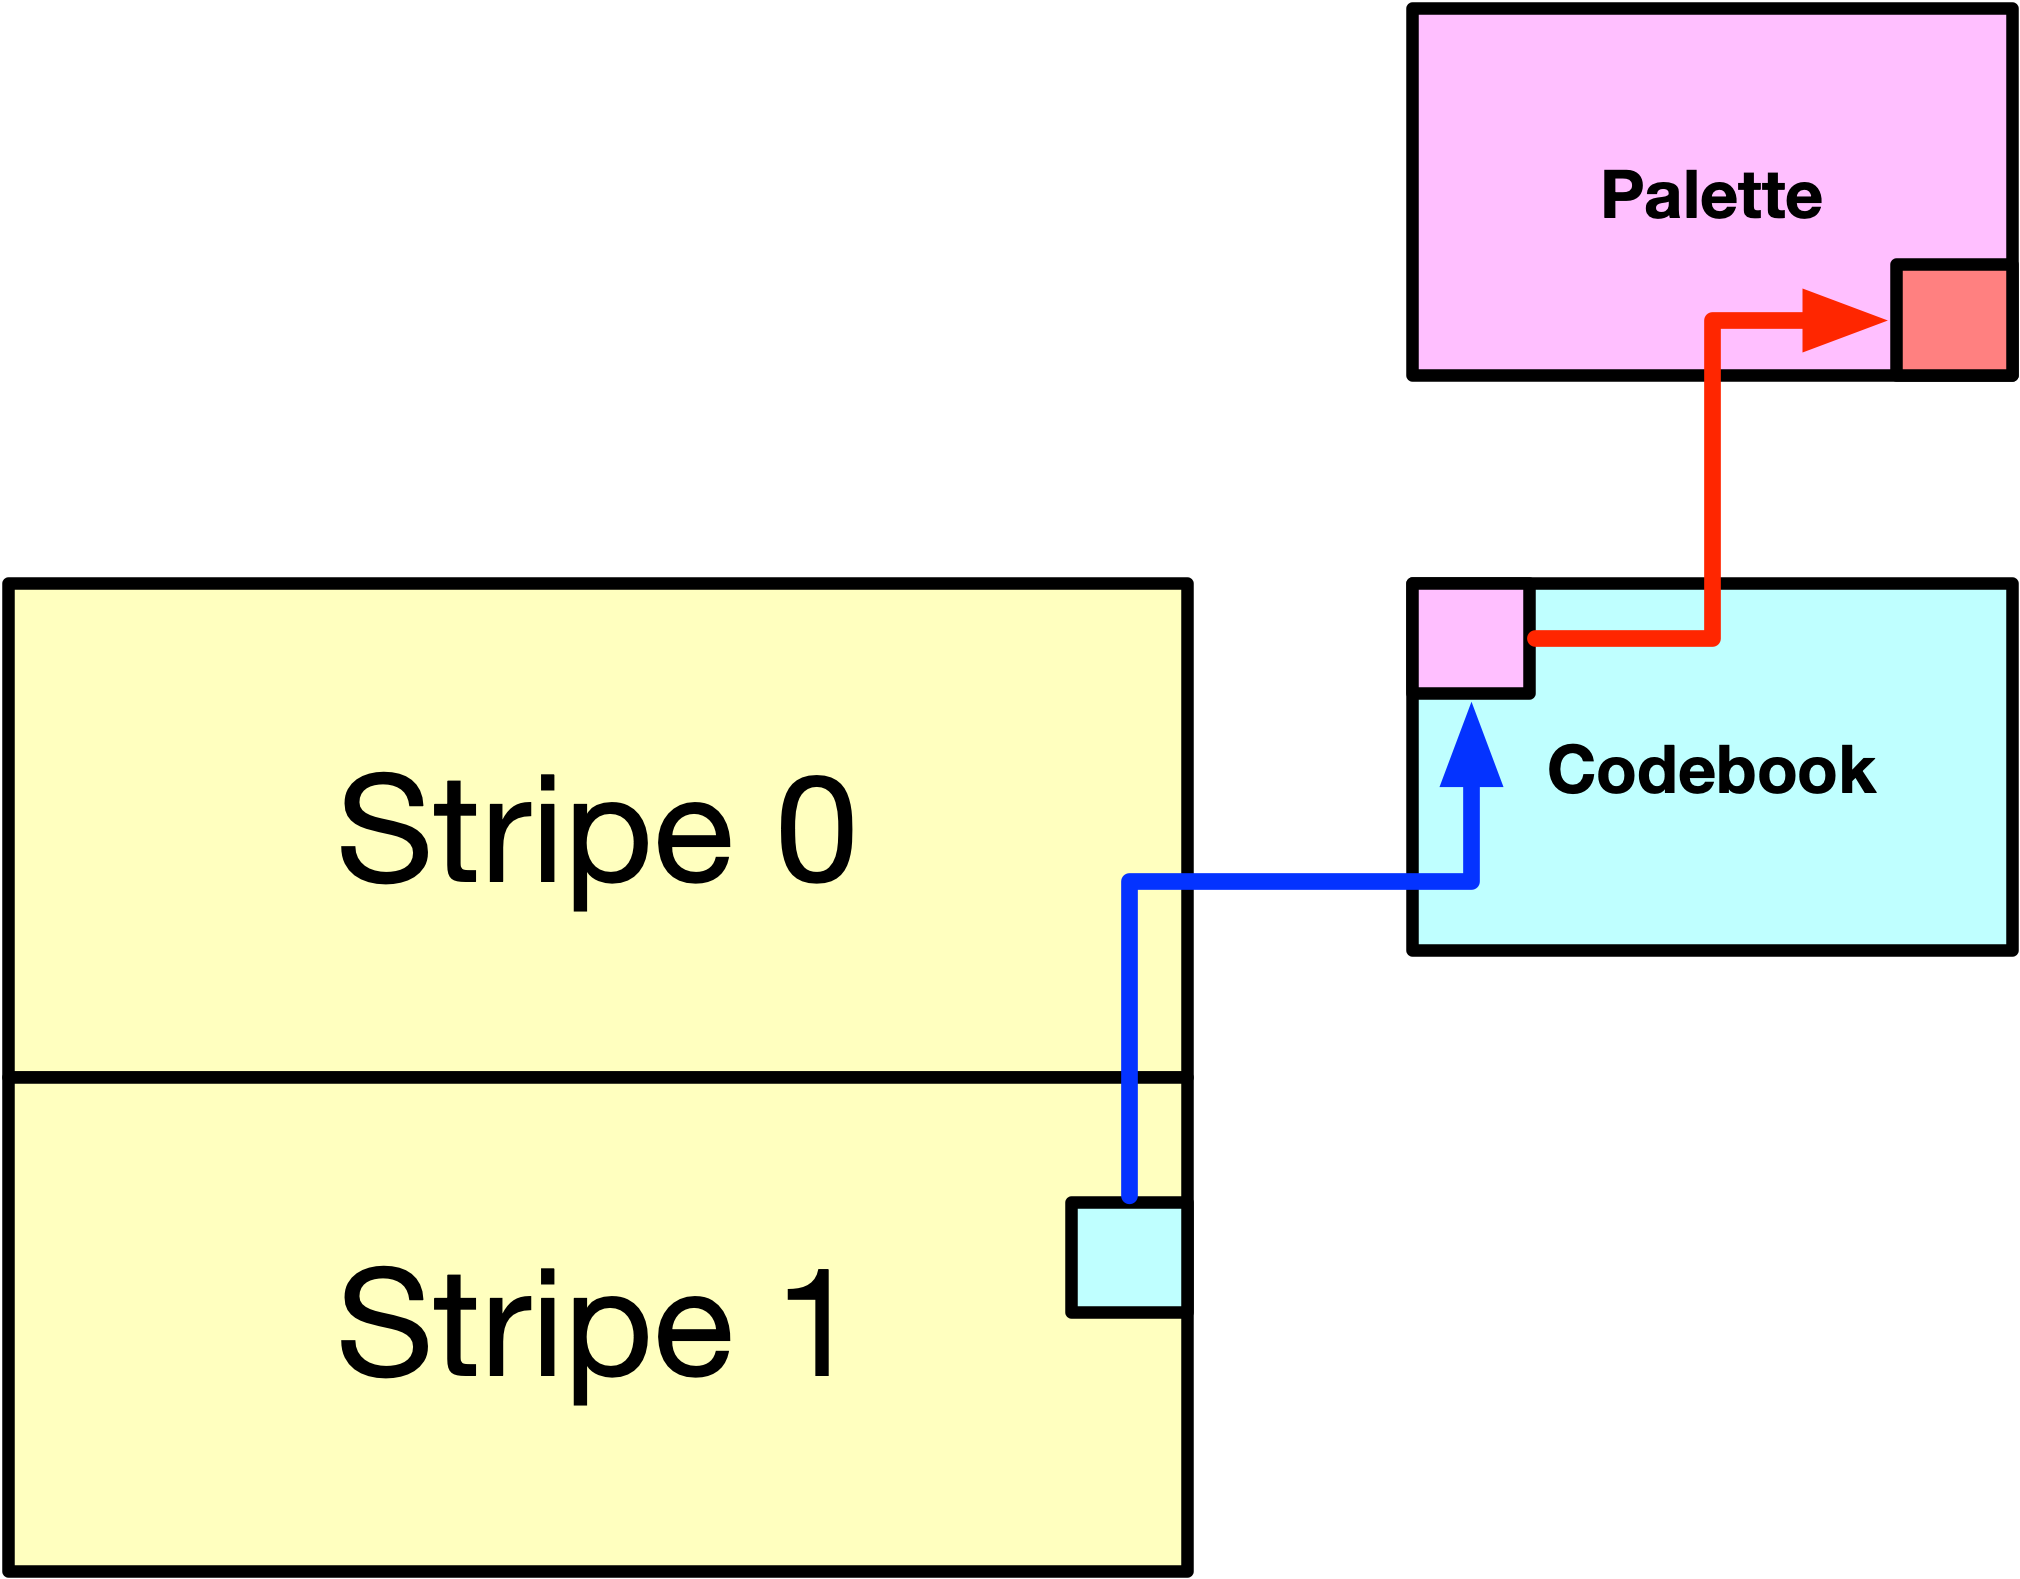
There is a saying that all computer science all problems can be solved with an extra level of indirection, and Cinepak in palette mode certainly feels like this.
While the decoding logic could handle a mixture of 8-bpp and 12-bpp codebook entries, I did not manage to get the the QuickTime 4.03 encoder to produce such images. That encoder also seems to always split pictures in two stripes. Some notes indicate the decoders could only handle up to 3 stripes.
Somehow I feel a modern encoder could optimise pictures more aggressively, for instance by also using different standard palettes. Another possible improvement is the way a V1 codebook entry is scaled up, currently, the pixels are just doubled, but some form of interpolation could make sense.
One thought on “Understanding Cinepak compression”