
Model railway track is typically built using some modular system, with a pre-determined geometry. The length of the tracks, the angle of the curves are defined by the manufacturer, and if you want to free yourself of these constraint, you need to hack.
Märklin C-Track follows this pattern. Compared to the metal M track from the good old days, the plastic base makes it much easier to work with. Here is how I create my own custom tracks.
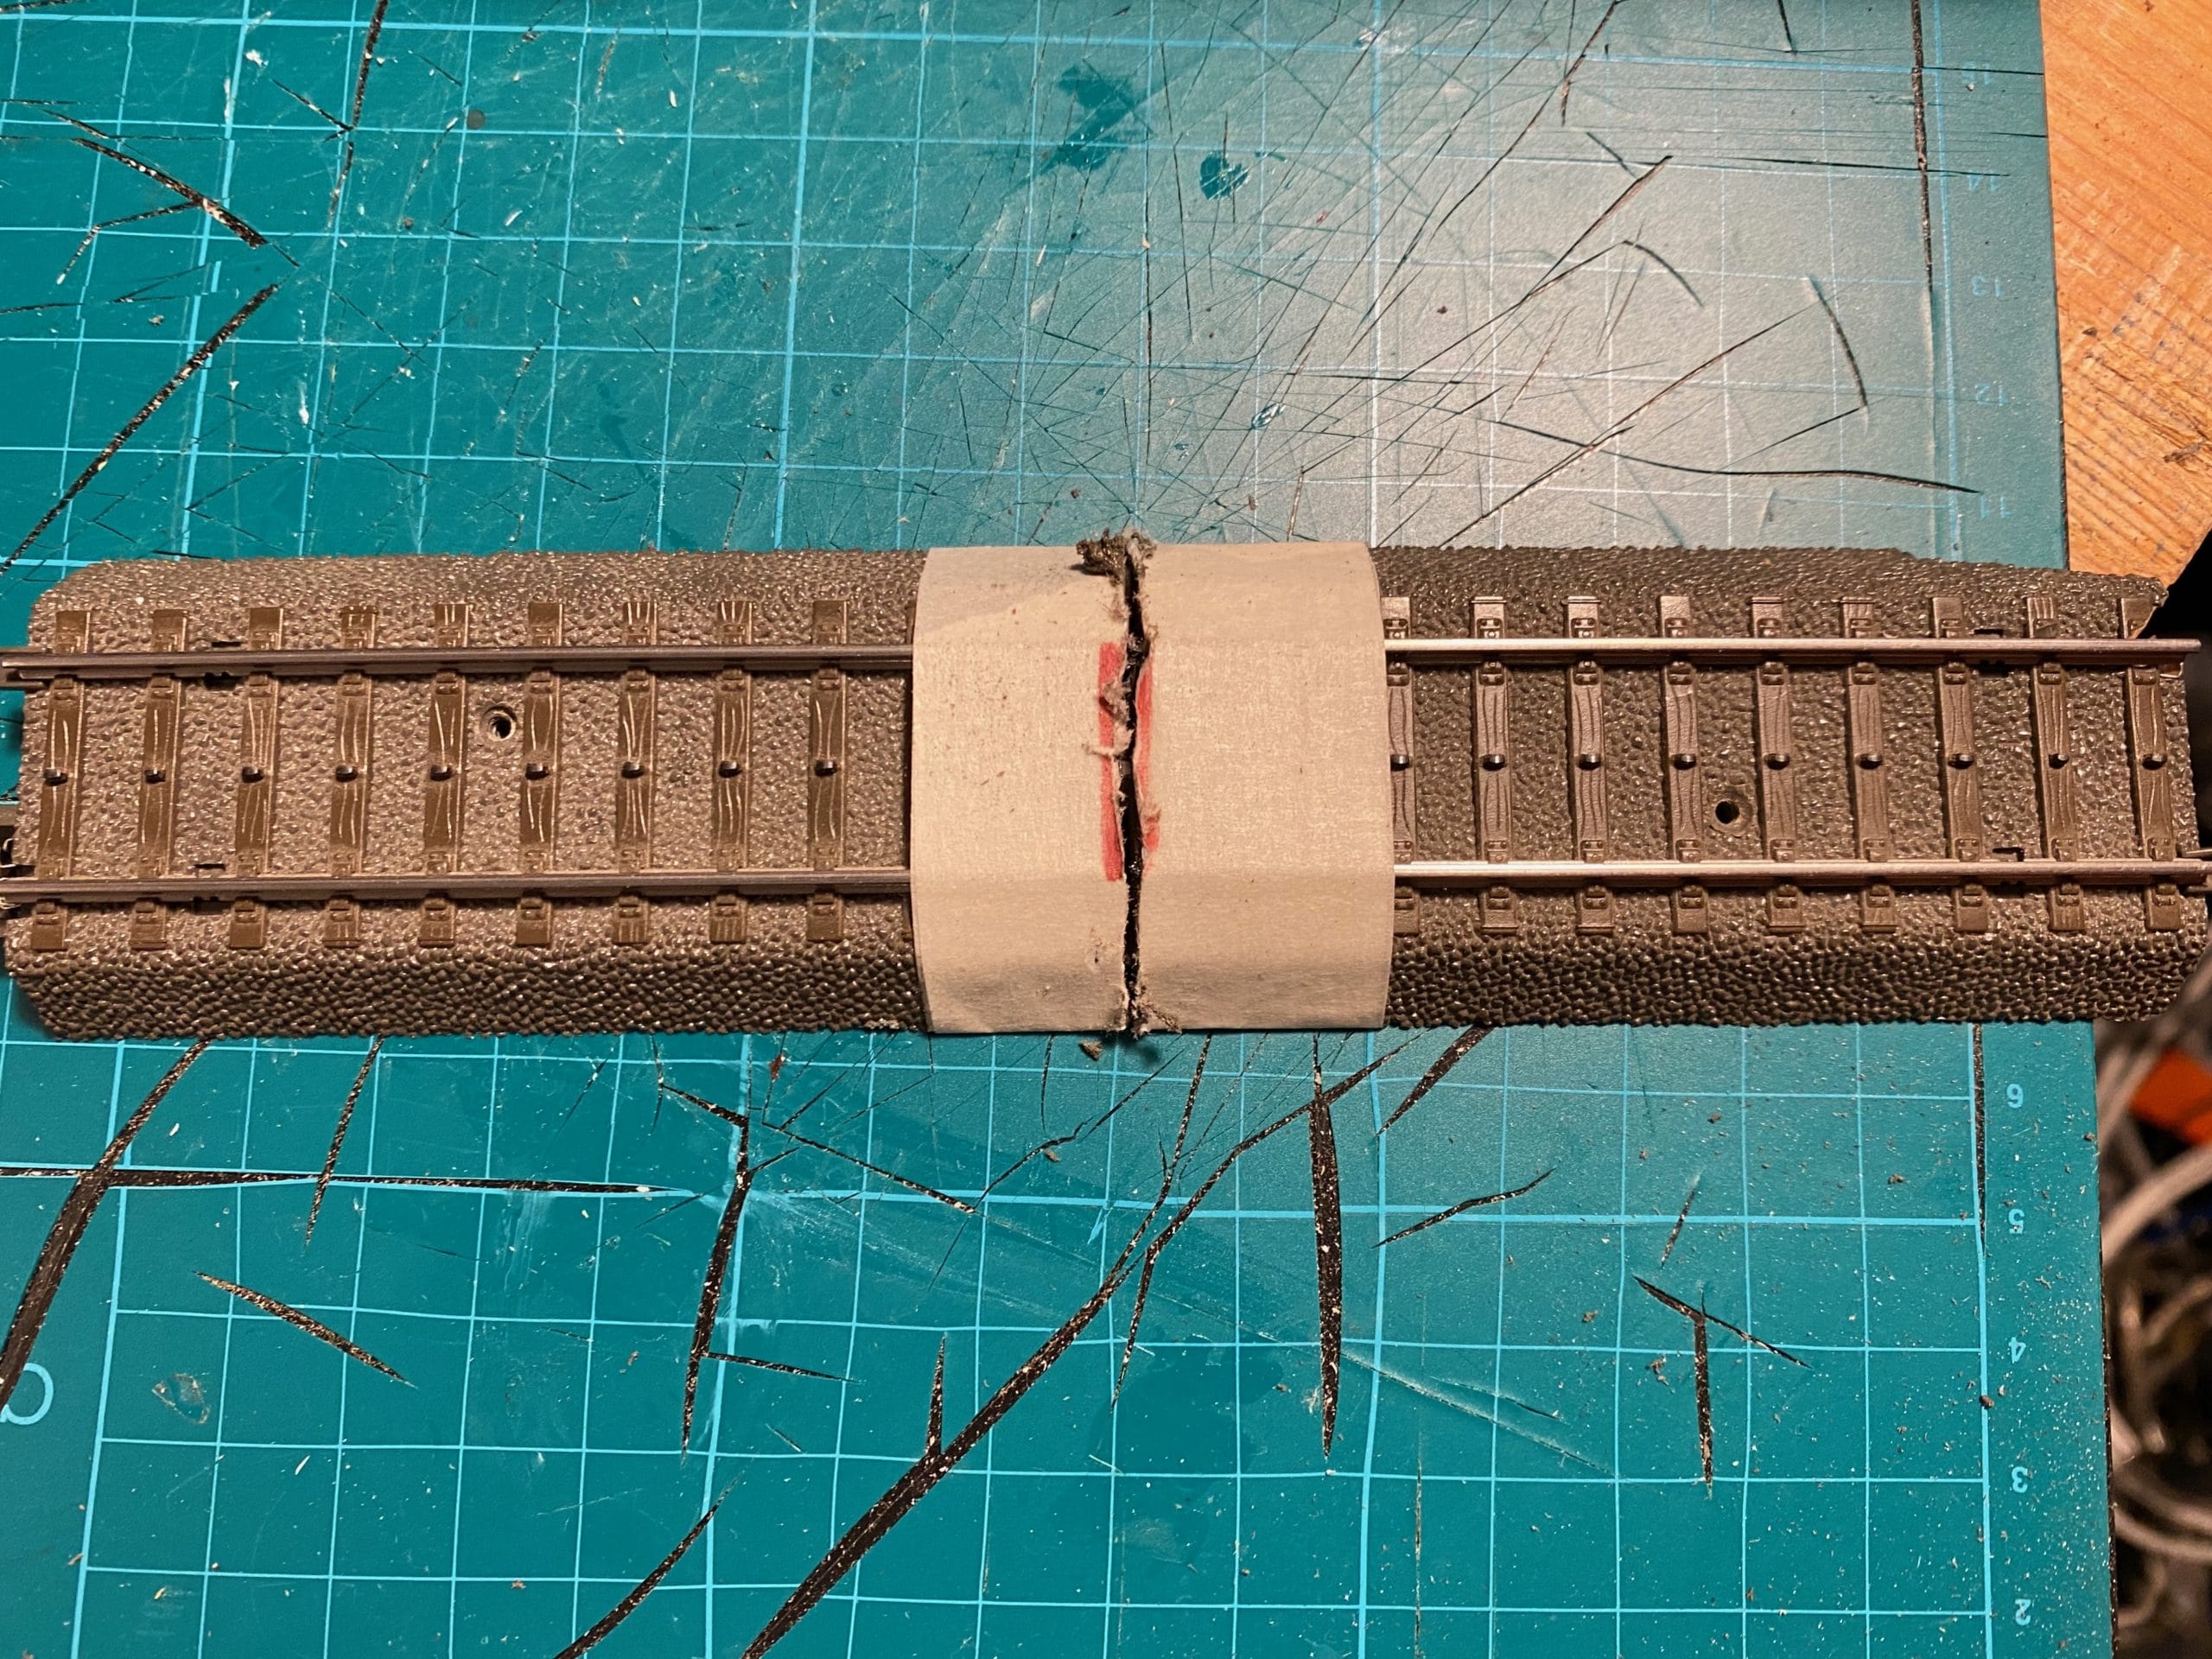
- Protect the area that will be cut with some tape, the goal is to prevent edges from breaking.
- Cut with a miniature rotary saw (Dremel), try to have a clean, straight cut, but do not wait too long or the heat will melt the plastic.
 With the same saw, make four cuts along the rails, half the length of the fish-plates you will use to assemble the track (red circles on the image).
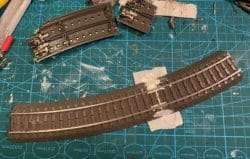
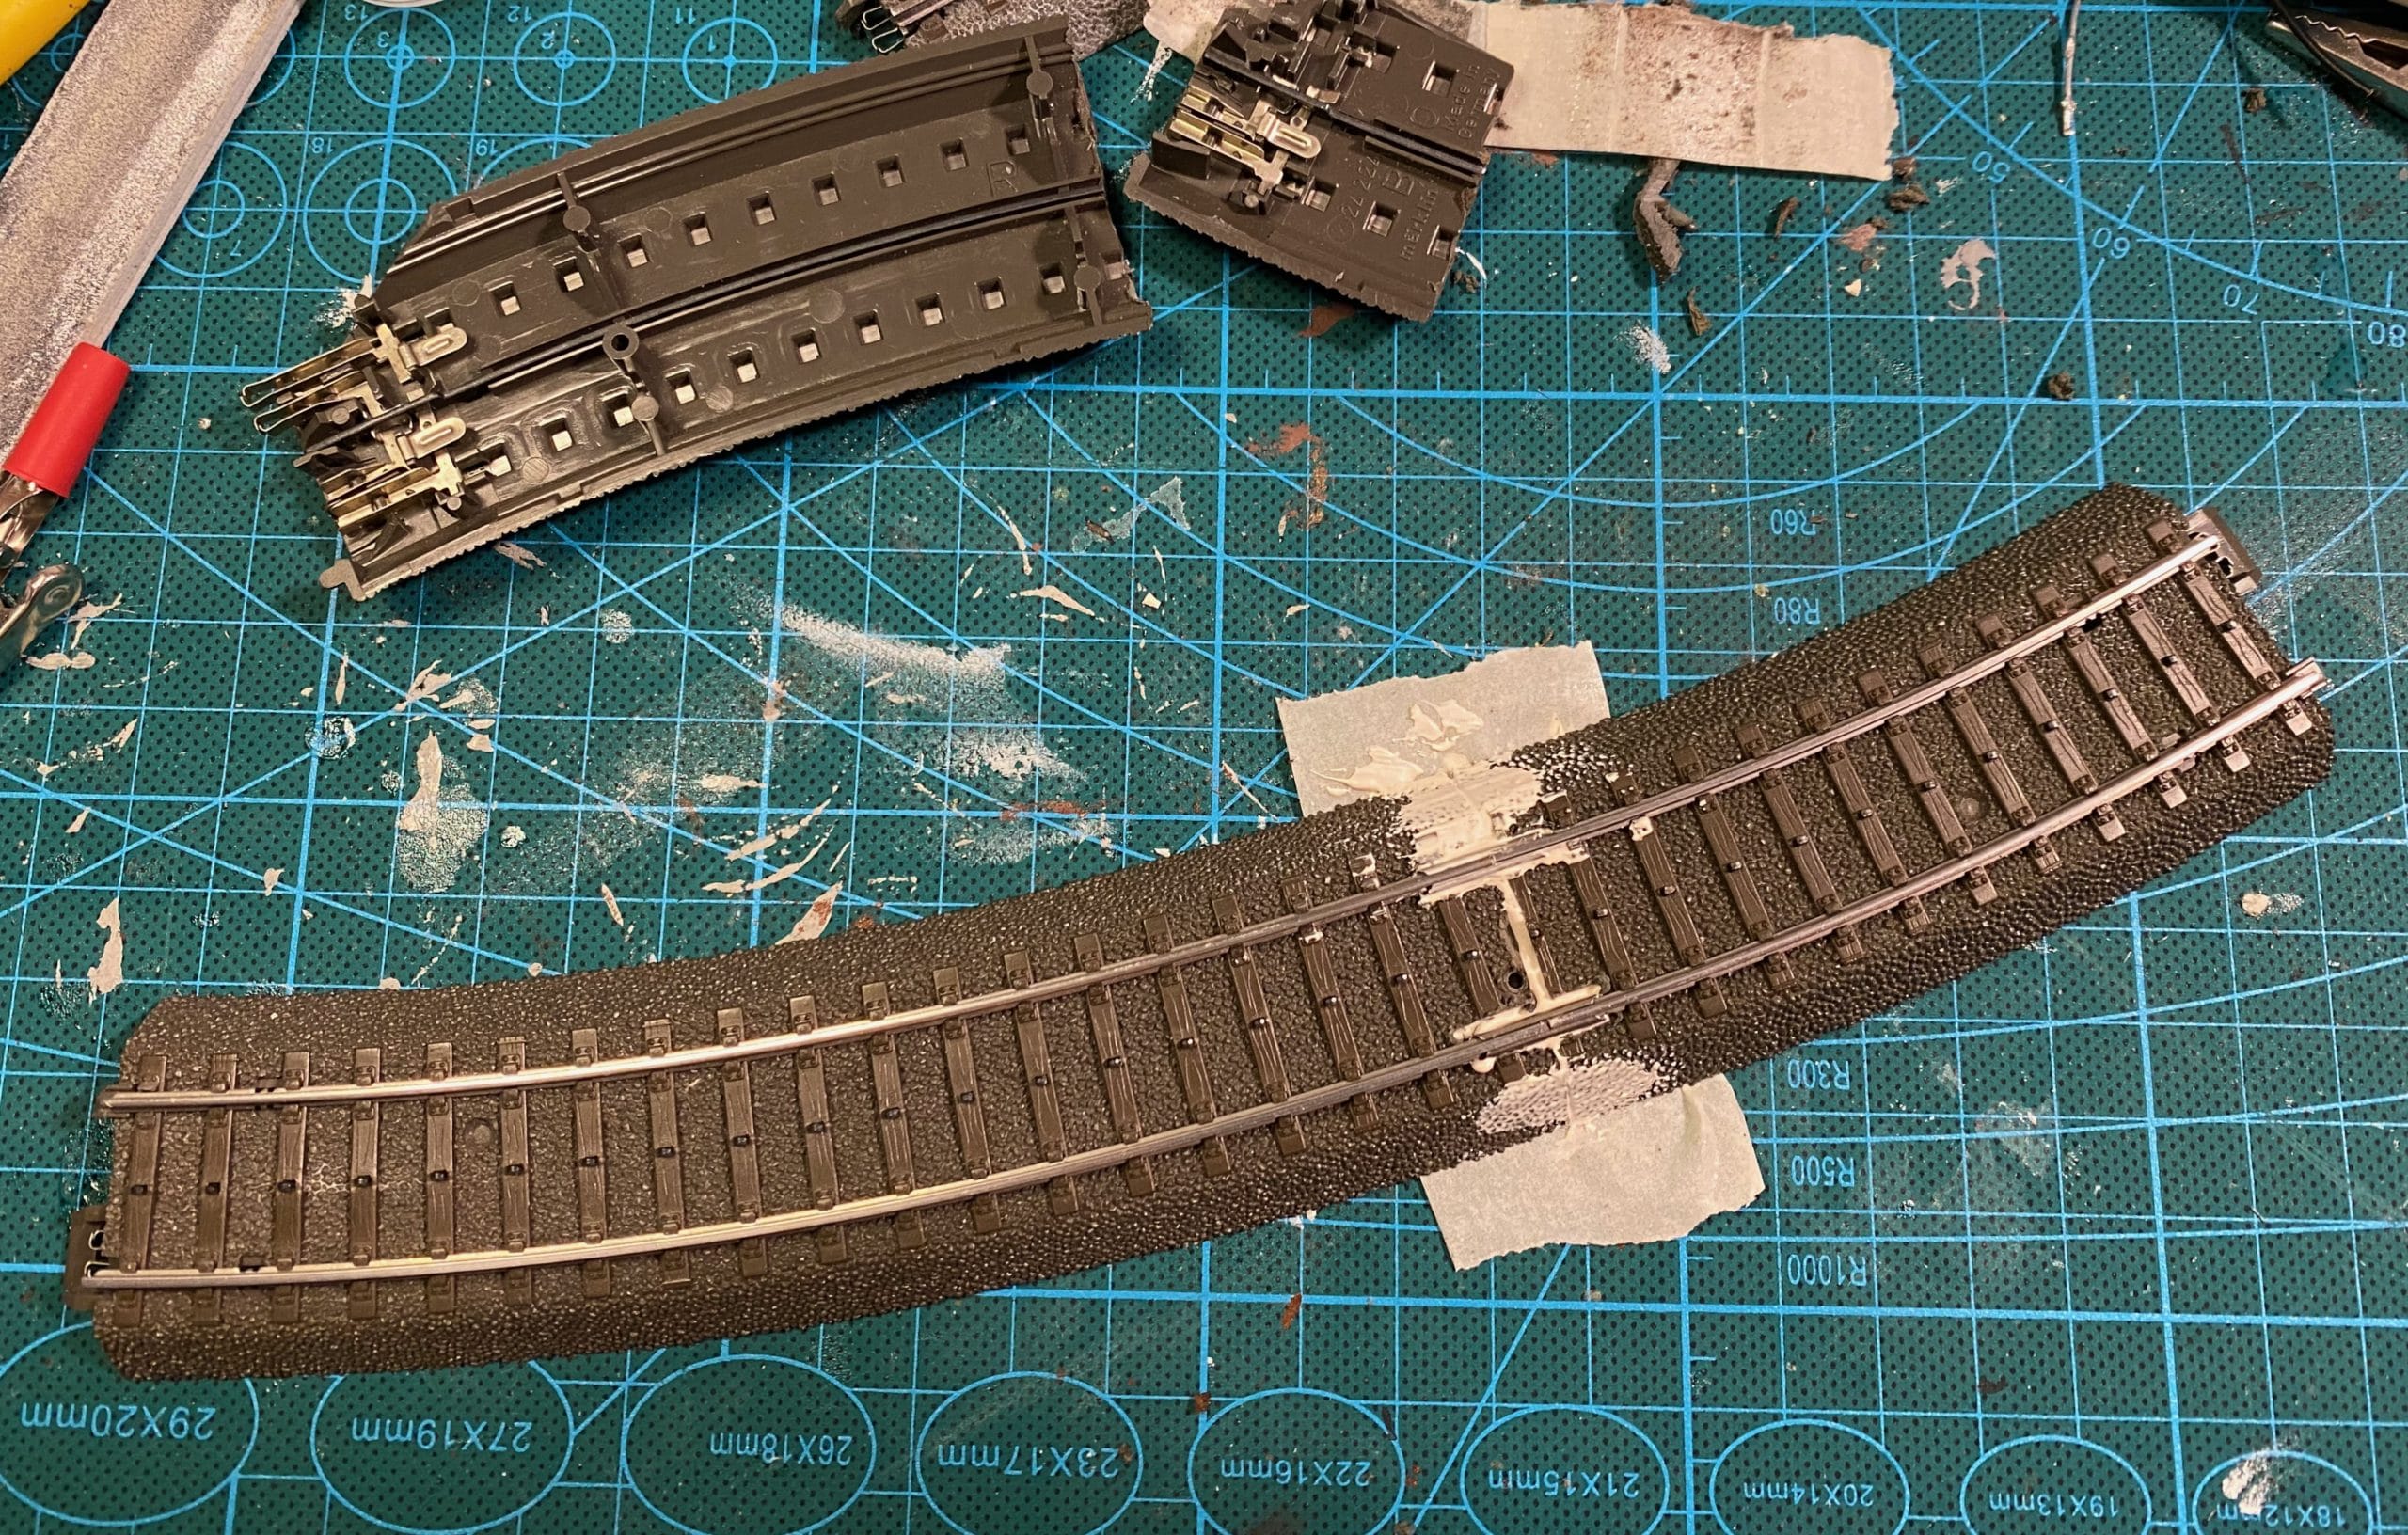
- Assemble the two track pieces with the fishplates. You can adjust the length of the rails by sanding with the rotary saw.
- Cover the top top of the track with tape and fill the joint in the roadbed with epoxy (the kind used to fill holes in car shells).
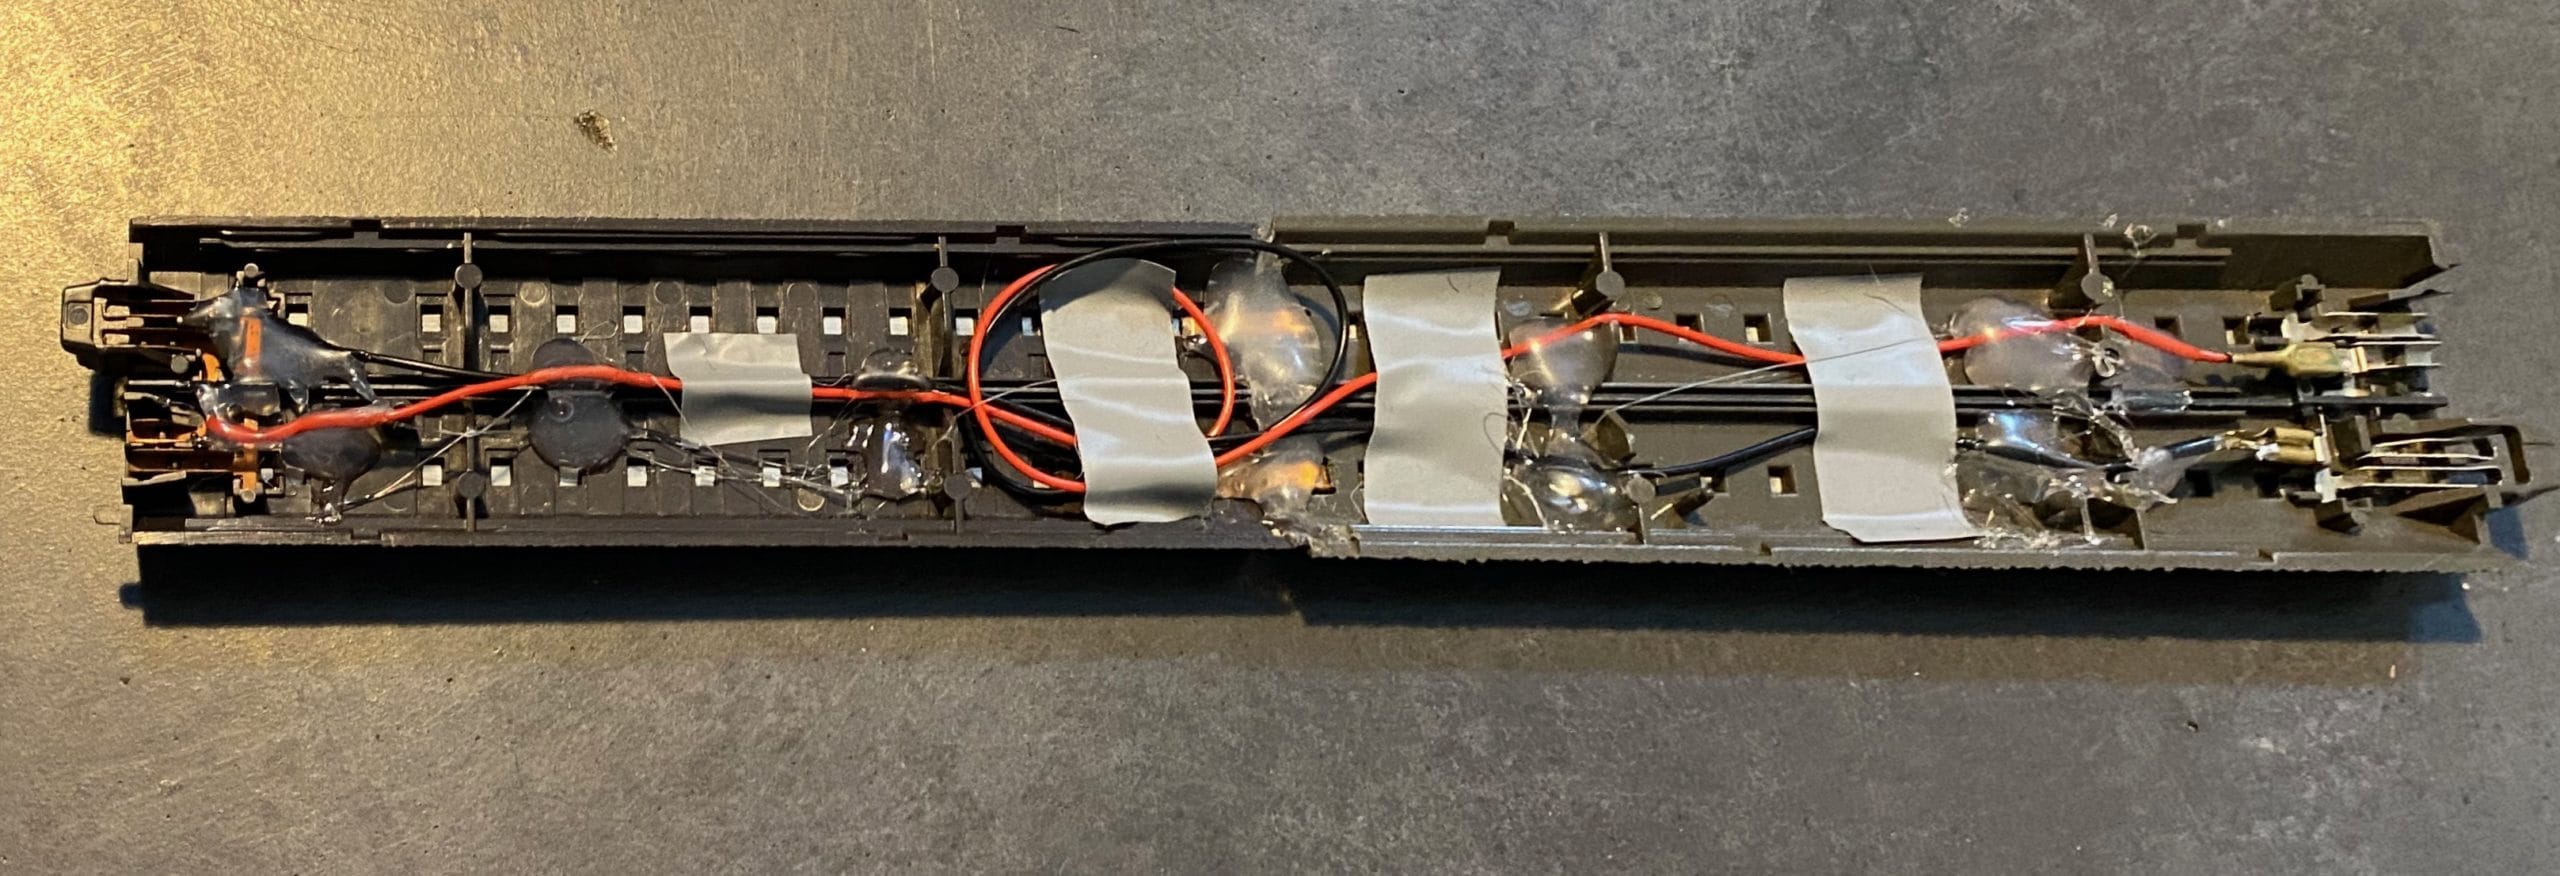
 Connect the power terminals with wire that connect both ends. Soldering is probably the most robust solution.
- Reinforce the joint with hot-glue, also use hot glue to fix the wires to the road bed. Hot glue also has the advantage of absorbing the noise.
- If the two track pieces you assembled have different rail height, for instance if you joined Märklin C-track (code 90) and Märklin 2000 / Märklin Alpha track (code 100), sand the transition region to make it smooth. You can you the rotary saw for this. One trick is to put an ice cube on the rails to absorb the heat, this will prevent the plastic from melting.
- Paint the transition region, epoxy absorbs paint pretty well, so you don’t need a primer.
I used this technique to assemble C-track pieces together, but also pieces from different brands, for instance Lima track. This allows for recovering broken track elements, typically by joined two track pieces which had one end broken. Note, this a translation of this french post.